Easy Ribbed Crochet Beanie Pattern: Free Beginner Project
This soft, stretchy ribbed beanie sits comfortably against your ears and provides reliable warmth during cold mornings or breezy evening walks. Beginners appreciate how quickly the simple rectangular construction comes together, while experienced makers enjoy the rhythmic, meditative nature of the back-loop-only stitches. It makes a thoughtful handmade gift that fits most adults, and you only need basic supplies from your stash to get started. You will learn how to create a neat edge and gather the top of the fabric effectively, resulting in a professional, store-bought look that feels completely personal and cozy.
Why You’ll Love This Pattern
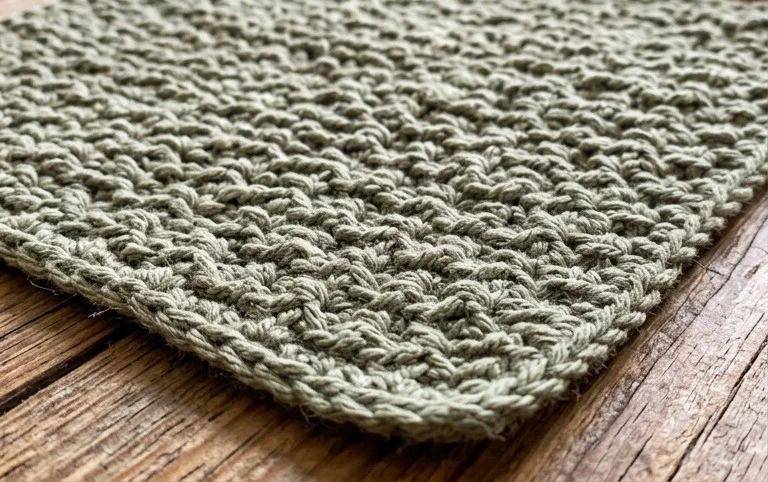
This crochet ribbed beanie pattern uses a simple rectangular panel construction that makes it incredibly beginner-friendly. Because it works up using back-loop-only stitches, the fabric gains significant horizontal stretch and a classic knit-like texture. It is a quick project that typically requires only one or two skeins of medium-weight yarn, making it an ideal choice for using up leftover stash yarn from previous projects. You can easily adjust the height of the hat by changing your starting chain count, allowing for a snug fit or a trendy slouchy silhouette.
I finished this hat in a single afternoon while watching a movie. The instructions were very easy to follow and the finished product fits perfectly without feeling too tight or loose.
— Sarah, hobbyist crocheter
Pattern Overview & Skill Level
- Skill Level: Beginner
- Approximate Time: 3 to 4 hours
- Construction: Flat rectangular panel worked in rows, folded and seamed to create a cylinder, then gathered at the top.
- Finished Dimensions & Sizing: Fits adult head circumference of 20 to 22 inches. Finished rectangle measures 9 inches wide by 11 inches tall before assembly.
Materials & Supplies Needed
- Yarn: Worsted #4 weight, acrylic or wool blend, approximately 200 yards.
- Hook Size: 5.5 mm / I-9.
- Notions: Tapestry needle for seaming, scissors, and a measuring tape.
- Safe yarn substitutions: Cotton yarn will provide a heavier, less elastic drape, while alpaca blends will offer more warmth but may require a smaller hook size to prevent excessive stretching.
Stitch Guide & Abbreviations (US Terms)
- ch: Chain
- st/sts: Stitch/stitches
- sl st: Slip stitch
- sc: Single crochet
- BLO: Back loop only. Insert hook through the back loop of the stitch instead of both loops.
- Turning ch: The chain made at the start of a row, which does not count as a stitch in this pattern.
Step-by-Step Pattern Instructions
Main Panel
- Row 1: Ch 41. Sc in the second ch from the hook and in every ch across. (40 sts)
- Row 2: Ch 1, turn. Work sc in the BLO of every st across. (40 sts)
- Rows 3 to 60: Repeat Row 2 until the piece measures approximately 18 to 20 inches in length when slightly stretched. (40 sts per row)
Assembly
- Fold the rectangle in half so the short ends touch.
- Using a tapestry needle and a long tail of yarn, whip stitch the two short ends together to create a tube.
- Turn the tube inside out so the seam is on the inside.
- Use your yarn needle to weave the yarn through the top edge of the tube using a running stitch.
- Pull the yarn tail tight to close the top of the hat, creating a gathered effect.
- Secure the center with a double knot and trim the excess yarn.
Care & Washing Instructions
- Hand wash in cool water using a mild wool-safe detergent to preserve fiber integrity.
- Lay the item flat on a clean towel to air dry, ensuring it stays out of direct sunlight to prevent color fading.
- Reshape the hat while damp if the ribbed fabric becomes distorted during the washing process.
Pro Tips & Common Mistakes to Avoid
Maintain consistent tension throughout your rows to ensure the edges of the rectangle remain straight for easier seaming. Use a stitch marker on the first stitch of every row to help you track your counts, as the back loop of the last stitch can sometimes disappear into the turning chain. When weaving in your ends, run the needle through the stitches on the inside of the seam to keep the exterior looking polished. If you want a larger size, add chains to your starting row in multiples of two, but keep in mind that this will require additional yardage to complete the extra height and width.
Frequently Asked Questions
Can I use a different weight of yarn for this hat?
Yes, but you will need to adjust your starting chain count and the number of rows. A thinner yarn will require more stitches to reach the same width, while a bulkier yarn will require fewer.
Is this pattern suitable for someone who has never crocheted before?
This is a perfect beginner project as it relies entirely on single crochet stitches and does not require complex shaping or counting in rounds.
Can I sell the hats I make from this pattern?
Yes, you may sell finished items made from this pattern, provided you credit the design. Please do not sell or redistribute the pattern document itself.
What is the best way to make the hat slouchier?
To create a slouchy fit, increase the number of stitches in your starting chain by 10 to 15, which will increase the overall length of the hat once it is folded over at the brim.
You now have a warm, stylish hat that feels as good as it looks. You might try holding two strands of thinner yarn together for a thicker, marled effect if you want to experiment with texture. Share your finished hat on social media to show off your hard work and inspire others. If you enjoyed this project, check out my other free crochet patterns on the blog for more simple, rewarding designs that keep your hands busy and your wardrobe full of handmade winter essentials.