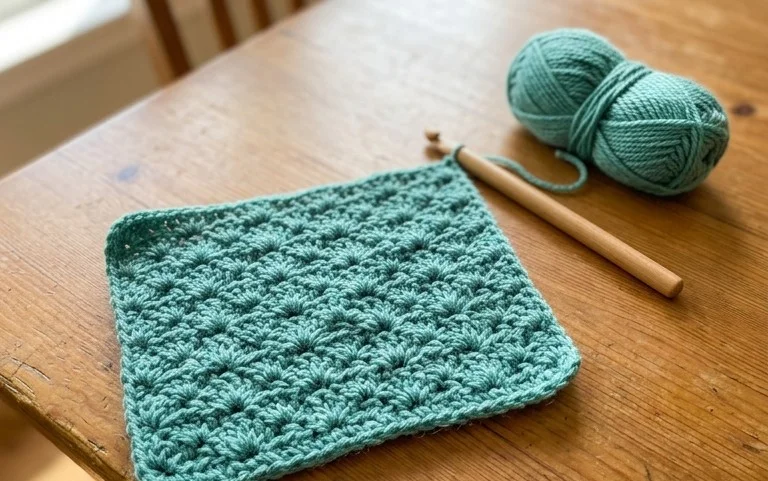
Classic Crochet Granny Square: Free Beginner Pattern
A soft stack of these squares feels like a well-loved blanket that has held its shape through years of use. This project works well for people who want to practice their hand tension without worrying about complex garment shaping or intricate stitch counts. You will find that the traditional three-double-crochet cluster creates a heavy, warm fabric that is suitable for everything from coasters to heavy throws. By learning how to turn your work after each round, you ensure the piece stays perfectly square and free of the common diagonal twist that plagues many beginners. It is a productive way to use leftover yarn ends.
Why You’ll Love This Pattern
The Classic Crochet Granny Square is the foundation of countless heritage-style blankets and modern garments alike. This specific design uses a traditional 3-double-crochet cluster technique that balances speed with structural integrity, making it ideal for clearing out your yarn stash. You can work this square in a single solid color for a minimalist aesthetic or transition through colors at every round to create a dynamic, kaleidoscopic effect. Because the construction is entirely modular, you gain the freedom to create anything from a small coaster to an expansive king-sized heirloom.
I have tried several different methods for granny squares, but this one creates the cleanest corners and the most consistent tension I have ever achieved. The instructions are incredibly easy to follow and it makes for a very relaxing evening project.
— Sarah, intermediate crocheter
Pattern Overview & Skill Level
- Skill Level: Beginner
- Approximate Time: 30 to 45 minutes per square
- Construction: Worked in joined rounds, turning after each round for a balanced, non-twisting finish
- Finished Dimensions: Approximately 5 inches by 5 inches using medium weight yarn
Materials & Supplies Needed
- Yarn: Worsted weight (#4), 100% acrylic or wool blend, approximately 20 yards per square.
- Hook Size: 5.0 mm (US H-8).
- Notions: Tapestry needle for weaving in ends, sharp embroidery scissors.
- Safe yarn substitutions: You may use DK weight (#3) for a smaller, more delicate square, though you will need to adjust your hook size to 4.0 mm (US G-6) to maintain the density of the stitches. Cotton yarns are excellent for durability but are less elastic than acrylic, which may require tighter tension control.
Stitch Guide & Abbreviations (US Terms)
- ch: Chain stitch
- sl st: Slip stitch
- dc: Double crochet
- cluster: A group of 3 dc stitches worked into the same space
- sp: Space created by the previous round’s chain stitches
- MR: Magic ring (or ch 4 and join with sl st to form a ring)
Step-by-Step Pattern Instructions
Granny Square Body
- Rnd 1: Start with a MR. Ch 3 (counts as first dc), work 2 dc into the ring, ch 2, *3 dc into ring, ch 2; repeat from * two more times. Join with a sl st to the top of the starting ch 3. (12 dc, 4 ch-2 spaces)
- Rnd 2: Sl st into the next dc and into the corner ch-2 sp. Ch 3, 2 dc in same sp, ch 2, 3 dc in same sp. *Ch 1, skip 3 dc, (3 dc, ch 2, 3 dc) in next ch-2 sp; repeat from * two more times. Ch 1, join with a sl st to the top of the starting ch 3. (24 dc, 4 ch-1 spaces, 4 ch-2 spaces)
- Rnd 3: Sl st into the next 2 dc and into the corner ch-2 sp. Ch 3, 2 dc in same sp, ch 2, 3 dc in same sp. *Ch 1, 3 dc in next ch-1 sp, ch 1, (3 dc, ch 2, 3 dc) in next corner ch-2 sp; repeat from * two more times. Ch 1, 3 dc in next ch-1 sp, ch 1, join with a sl st to top of starting ch 3. (36 dc, 8 ch-1 spaces, 4 ch-2 spaces)
- Rnd 4: Sl st into the next 2 dc and into the corner ch-2 sp. Ch 3, 2 dc in same sp, ch 2, 3 dc in same sp. *Ch 1, (3 dc in next ch-1 sp, ch 1) twice, (3 dc, ch 2, 3 dc) in next corner ch-2 sp; repeat from * two more times. Ch 1, (3 dc in next ch-1 sp, ch 1) twice, join with a sl st to the top of the starting ch 3. (48 dc, 12 ch-1 spaces, 4 ch-2 spaces)
Finishing
Fasten off your yarn, leaving a 6-inch tail. Use your tapestry needle to weave the tail through the back loops of the stitches from the final round until secure. Trim the excess yarn close to the fabric to ensure a clean appearance on both sides.
Care & Washing Instructions
- Machine wash your finished item on a gentle cycle in cool water (max 30C/86F).
- Lay the item flat on a towel in a shaded area to air dry, avoiding direct heat sources that can damage synthetic fibers.
- If the square loses its shape during washing, gently stretch it back into a square while damp and pin it to a blocking board until completely dry.
Pro Tips & Common Mistakes to Avoid
- Consistent Tension: Double crochet stitches can vary in height depending on how you pull up the initial loop. Try to maintain the same vertical height for every stitch to prevent the square from buckling.
- Stitch Markers: Use a locking stitch marker in the first chain of the round so you can easily identify the correct spot for your final slip stitch join.
- Weaving Ends: Weave your ends in multiple directions—horizontally, then vertically—to ensure they do not pull out over time with regular use.
- Size Adjustments: You can make the square larger by simply continuing the pattern established in Round 4, adding an extra (3 dc, ch 1) sequence for every additional row. Note that larger squares will consume significantly more yardage, so ensure you have enough yarn on hand before starting.
Frequently Asked Questions
Can I sell the squares I make using this pattern?
You are welcome to sell finished items created from this pattern. I only ask that you credit the designer and provide a link back to the original source if you choose to list them online.
Is this pattern suitable for someone who has never held a crochet hook?
Yes, this is an ideal entry-level project. It uses only the most basic stitches and requires very little counting, which helps you build confidence in your hook control and tension management.
How do I swap to a new color between rounds?
To change colors, complete the final slip stitch of your current round using the new yarn color. Alternatively, fasten off at the end of a round and join the new yarn in any corner space with a standing double crochet or a chain-up start.
Will my square curl if my tension is too tight?
Tight tension often causes the square to cup or curl. If your square does not lay flat on a table, try moving up to a slightly larger hook size, such as a 5.5 mm (I-9), to allow the stitches more room to breathe.
Your finished squares create a clean, crisp foundation that works for any home project you choose to tackle next. Try holding two strands of yarn together for a thicker, chunkier texture if you want the piece to feel more substantial on your couch. Posting a photo of your progress helps other makers see how different color combinations look in practice. You can find many other free patterns for blankets and accessories on the main blog page, so feel free to browse those before you start your next colorful project tonight.